Showing posts with label Foodography. Show all posts

Friday, July 11, 2014

TRYING SQUIDBALL AGAIN

I have promised a friend I will blog about my squidball recipe & here I am.

It has been a long time since my first & last attempt in making squidball. But because K was craving for it, I thought of giving it a chance again. This time, I searched the net & compared recipes specifically those with videos. Glad to find Pinay Cooking Lessons in YouTube. Her video was easy to understand & follow. She also have a lot of helpful tips.

Instead of fish, I used squid & made a little changes in the recipe but you can find the complete video with the recipe here. However, I didn't have a mini chopper; so for now, I used the mill grinder that came along when we bought a blender.

SHRIMP-SQUID BALL

Ingredients:
500 g. Shrimp, shelled & devained
250 g. Squid, cleaned & cut into rings
4 tbsp. Cornstarch
3 tbsp. Carrots, minced
2 tbsp. Onion leaves, finely chopped
1 Egg white
1/2 tsp. Garlic, finely mined
1 tsp. Sugar
1/4 tsp. Ginger juice
Salt & pepper to taste
Canola or vegetable oil for deep frying

Directions:
Using a chopper, finely minced the shrimp & squid, separately.

In a mixing bowl, combine all the ingredients together. Mix well until all the ingredients are incorporated together.

Heat the oil in a deep sauce pan, Using two teaspoons, scoop a little shrimp-squid mixture with one teaspoon. Form a ball using the other teaspoon by transferring the shrimp-squid mixture between each other. Drop 1 ball to the heated oil first & deep fry until golden brown. Note that it will expend during cooking & shrinks when taken out of the heat. Scoop out the squidball once cooked & drain excess oil in paper towel. Taste to know if the mixture is just right.

Once you get the squidball according to your taste, you can repeat this process by batch until you finish all the shrimp-squid mixture. Remember not to over crowd the pan.

Serve with sweet & sour sauce or just like us, patis (fish sauce) with lemon. I tried to make Pinay Cooking Lessons' sauce (Nanay Lilay's Fishball Sauce) but it was a fail. Will try next time though.

Will post my chickenball recipe in the coming days. Enjoy your squidball...

Thursday, January 12, 2012

PATATIM for Noche Buena

we celebrated last new year's eve with one of our close family friends (the cayabyabs) since we live in the same house villa. we just stayed home believing that staying and welcoming the new year together will keep our family intact. that was our 5th year of celebrating new years here in uae. 

we just had a simple dinner with wine and conversation. then we watched the fireworks at the burj khlifa live on tv. the cayabyabs shared their pasta marinara and it was yummy. we prepared pancit canton, macaroni fruit salad and patatim. finally, i was able to convinced K to prepare patatim this time instead of the usual lechon ala kim. this was our first time and it was a success. 

i searched the net for a simple patatim recipe and as always i visit ms. connie's foodblog. there i found her 2 patatim recipes but K and i decided to follow her braised pork hock recipe but substituting other ingredients with what's available here in al ain.

it turned out quiet good and even more tasty the next day. but as ms. connie said, "when you substitute, the result always changes and you may have something not good or something better". i can't say it's better but it's good. 

Monday, September 26, 2011

MAX'S STYLE FRIED CHICKEN { Foodography }

Yay... I was just browsing the net for random foodies that would capture my eyes... What? What am I saying?... Whatever... LOL. And then I came across this recipe which I have been wanting to try, Max's style fried chicken (sarap to the bones!) from Panlasang Pinoy. You can view Vanjo Merano's Max's Style fried Chicken recipe here with a video on step-by-step procedure. Thanks Vanjo for sharing.

Digiscrapping mojo is m-i-s-s-i-n-g, I have been trying to finish this kit for 2 weeks now & I'm still halfway to the finish line. Hump... On the other hand, the cooky me is present, so here's my take to the Philippines Max's style fried chicken which is the most popular dish of the Max's Restaurant.

Ingredients:
1 whole Chicken
6 pcs. Dried bay leaves
1/4 cup Cilantro or Parsley, chopped
4 cups Water
3 cups Cooking oil
2 tsp. Salt
1 tsp. Ground black pepper

Direction:
1. In a steamer, pour the water and bring to a boil.

2. Add the dried bay leaves and chopped cilantro in the boiling water.

3. Steam the chicken for 45 minutes.

4. Remove the chicken from the steamer and allow the excess liquid to drip. Let the chicken cool down.

5. Rub salt and pepper all over the chicken.

6. In a deep-fryer or tall pot, pour the cooking oil and apply heat.

7. When the cooking oil is hot enough, deep-fry the chicken for about 12 minutes. (If the chicken is not entirely immersed in oil, flip the chicken to fry the other side for another 12 minutes or until color turns golden brown)

8. Remove the chicken from the fryer and allow oil to drip.

- - - - - - -

The verdict as per the Hubby... looks & tastes like the real Max's friend chicken. But best served with ketchup, hot sauce (Tabasco) & soy sauce. I will be trying this again later and I will add dried lemon during steaming; then place it in the refrigerator covered after cooling down. I have read somewhere that when placed inside the refrigerator, the skin will tightened and become crunchy or crisp when deep fried. Hmmm... got to try that later.

Just made a little search and found that I have tried this before (even blogged about it here) but I just used a chicken leg instead of whole chicken. So far, as I was trying to remember the taste of it, I like this version by Panlasang Pinoy better but Mr Ut-man's version is worth trying, too. This is just my preference, maybe also because I am not into patis really. Hehehe... Hmmm... will try Mr. Ut-man's version soon, too.


Thanks for dropping by.


Note:
Will update the photo later... it should be MAX'S Style Fried Chicken instead of MAX Style Fried Chicken. Pardon me.

Monday, September 19, 2011

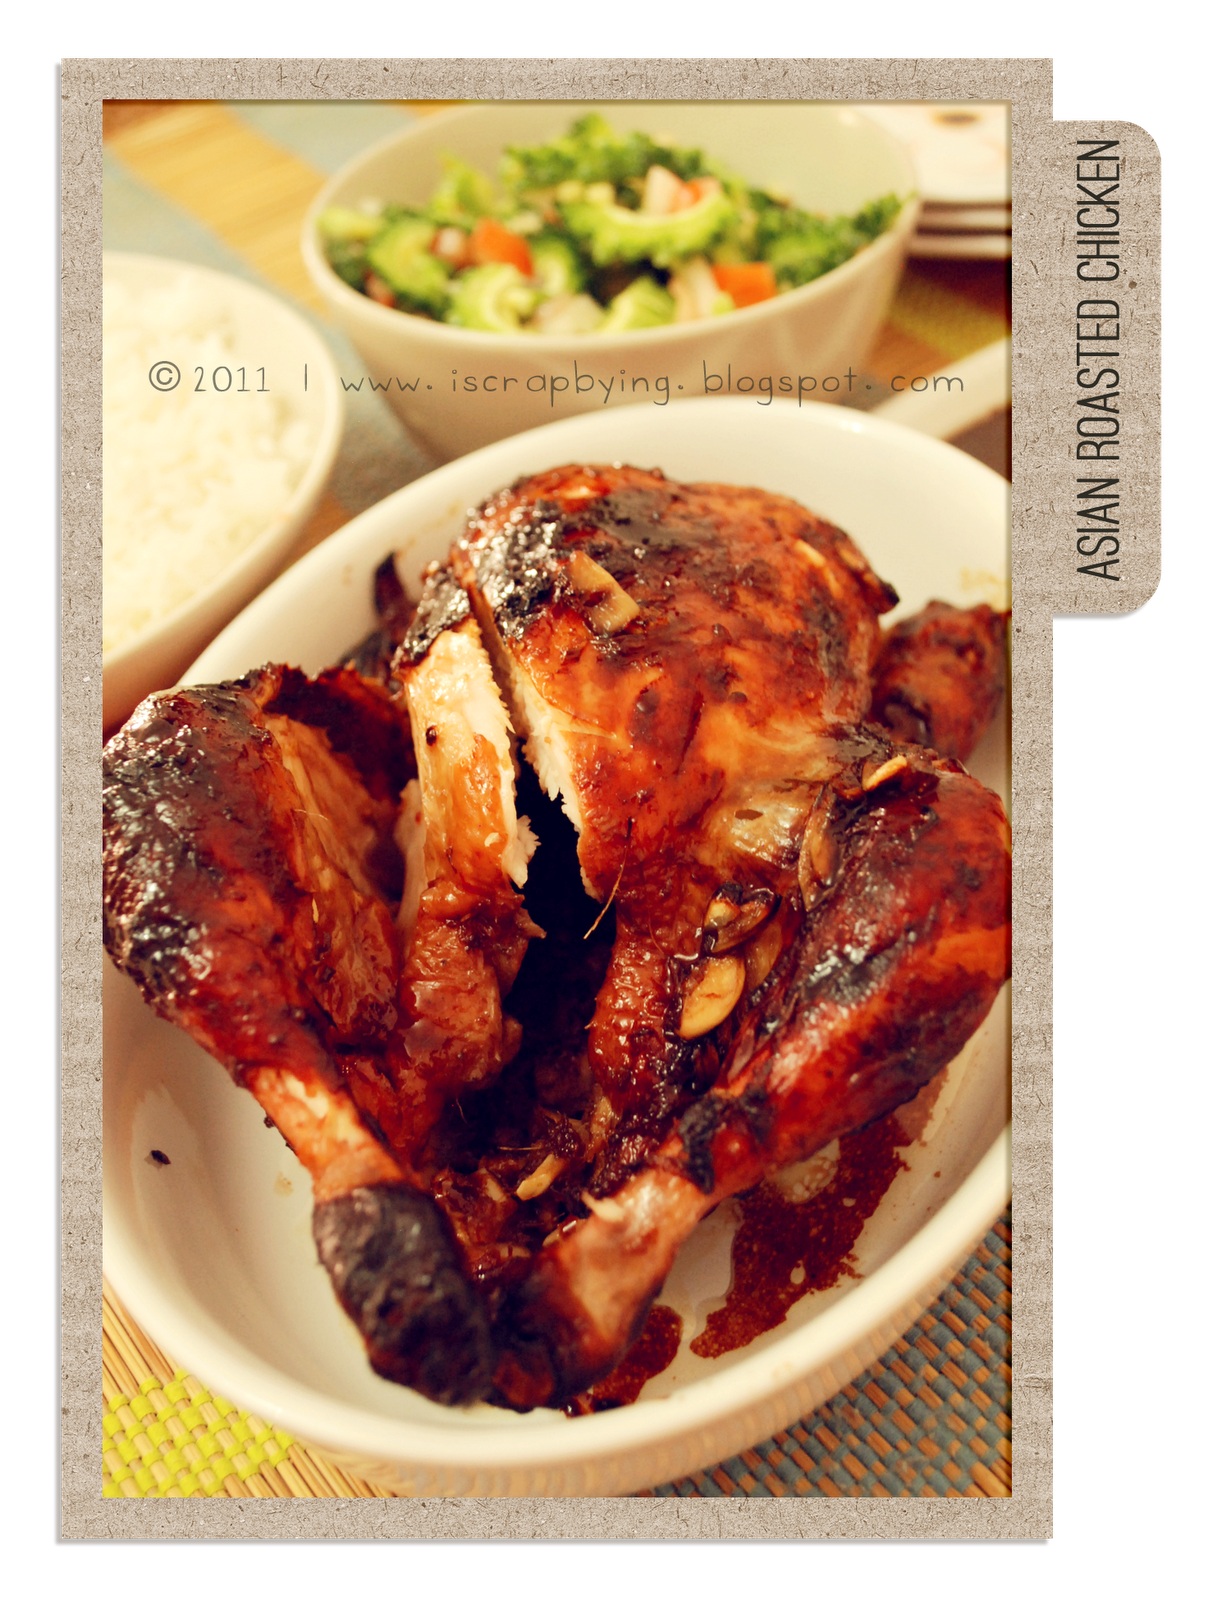
ASIAN ROASTED CHICKEN { Foodography }


I have been wanting to blog about this for weeks already but just had enough time to do it right now. Lol. We celebrated our 8th wedding anniversary last month, August 28, 2011 to be exact. But we chose to celebrate it the day before I chose to cook the day before our anniversary since the 28th would be a Sunday, a working day for all of us here in UAE. A few days before I am already scanning my new free food magazines, Good Taste, for easy-to-bake goodness and fortunately found this yumminess. I think it is easy to bake and delicious, too. And I am so glad everybody liked it. Later in the afternoon. hubby and I watched a movie; I considered it a date since we rarely go out anymore. We watched Zookeeper and we enjoyed and we kept on laughing.

So try this sumptuous roasted chicken. It is easy to bake with less and easy-to-find ingredients required. Here the recipe recommended to serve it with steamed vegetables but we served it with Ampalaya Salad (Bitter Gourd Salad). The chicken meat is soft, juicy and tasty; a little bit of sweetness and chili were there but no ingredient empowered the taste. It's a blend of everything. As for the chili sauce, I used sweet chilli sauce instead and  used only 20 ml since I have kids. I wanted them to enjoy the chicken.

Asian Roasted Chicken


Preparation Time: 10 minutes
Cooking Time: 90 minutes
Serves: 4

Ingredients:
15 ml Sesame oil
15 ml Oil
30 ml Lemon juice
15 ml Garlic, chopped
30 ml Fresh ginger, grated
30 ml Chili sauce
30ml Soy sauce
30 ml Hoisin sauce
30 ml Honey or apricot jam
1 medium Whole free-range chicken
Strings for tying the chicken legs

Procedure:
1.Pre-heat oven to 200ºC.

2. Combine all the ingredients (except the chicken and string) in a bowl to make a basting sauce.

3. Rinse the chicken and pat dry. Place in roasting tray and brush with basting sauce. Tie the legs of the chicken with a string and tuck in the wings.

4. Place the chicken in the oven and roast for 90 minutes.

5. Remove from pan, tipping the juices from the cavity into the pan, and allow it to rest for 5 minutes.

6. Cut the chicken into portions and serve with steamed rice, green beans, bok choy or wilted baby spinach.

Note:
While the chicken is resting, pour 125 ml coconut milk into the simmering pan with the juices (from the chicken) and stir well to make a fragrant gravy. Just a few minutes or until the gravy is a little thick but pourable. For me, I placed the roasting tray directly on the stove top and then cook the gravy from there.